An Update for the New-Sew Fleece Techniques

A few months ago, we shared some skill techniques for finishing the edges of a fringed no-sew fleece blanket. The response was wonderful! We love Pinterest…

You can see the original post here: https://www.sandicrafts.com/no-sew-blanket-knot-tying/

And her update here: https://www.sandicrafts.com/no-sew-no-tie-fleece-blanket-video/

Sandi also shot two YouTube videos to show this technique and a variation. Continue reading »

How to Sharpen Your Tools – Part 1, Concepts

What You Need to Know

One of the quickest ways to bring frustration to your craft table is to try to use dull tools. Instead of cutting, they tear. Instead of being easy on your hands, you push or squeeze harder and fatigue sets in. It is more difficult to move though the material, and it is more dangerous as you apply pressure, and the tool slips. It is expensive to keep on replacing tools that are too dull to use.

Sharpening your tools is a necessary skill to learn. Not only do you save money by not replacing tools, but a sharp tool makes crafting fun.

I can teach you how. It will take 3 posts to cover what you need to know. Continue reading »

No-Sew, No-Tie Fleece Blanket Videos

I know many of you have been looking for a tutorial that gives a little better view of the edging treatment on the no sew blanket, and hopefully these little videos will answer your questions.

No-sew, No-tie YouTube Video


Another No-sew, No-tie YouTube Video

You will cut the “fringe” just as you always have, or as the directions on the kits specify. Instead of tying knots, you snip in the middle of the strips, then pull them through the hole.

I had a really hard time finding a pair of scissors that would do a good job on the cutting. I loved the heavy duty craft scissors sold here: Heavy Duty Craft Scissors

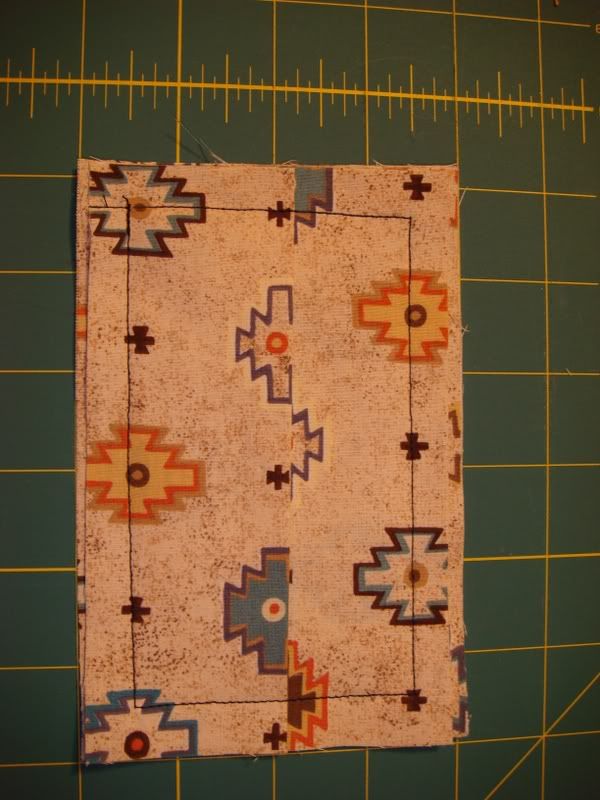
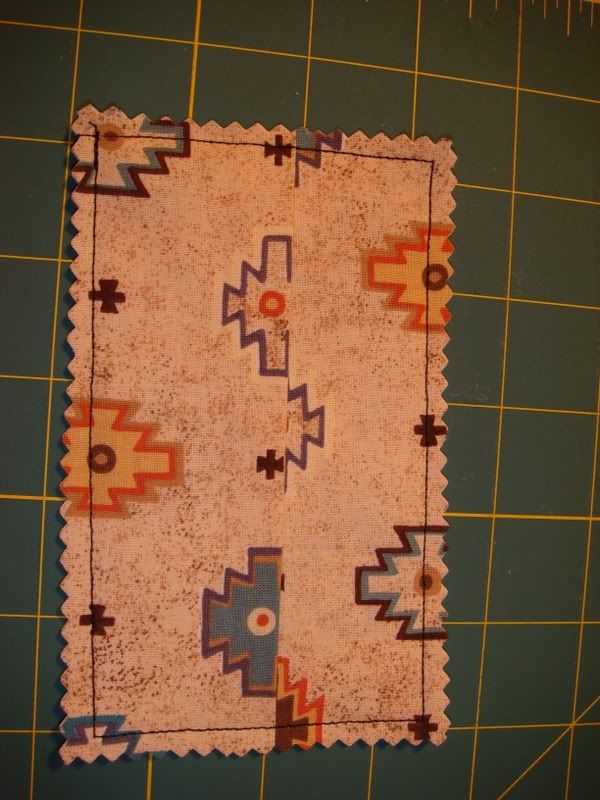
I’ve also shown another edge treatment that I really like. On this T shirt blanket stitch method, you don’t cut strips and don’t cut out the corners. Use a craft knife to make little holes, then blanket stitch around the entire blanket. I’ve shown how to make the stitches on the same video.

I find both of these edging methods faster than the traditional knot tying method.

Have fun making your blankets, and let me know how you like it.

Sandi P

Appliqued Hand Towel

I recently hosted a fat quarter challenge and had several fun new ideas. This one was created by my friend Sandra in Australia. You can find her web site here: Creatables by Sandra

Cut a hand towel in half and overlock the cut edge.

(please note if you want a longer towel you can use a full length one and just cut the bound edge off one end and overlock that)

Here is a scanned image of the pattern piece that you cut out of the fabric or fat quarter, Continue reading »

Easy Sew Tissue Covers by Lynn

Lynn is a great fabric crafter, and has created many quick and easy gift items.  I think everyone can use a tissue cover for those handy little tissue packets.
These take 4 – 4X6 pieces of material. You can make 3 out a 1/4 yard of fabric.
Take 2 of the pieces and put them wrong sides together, fold and press the other 2 in half wrong sides together along the short sides.

Put the folded pieces on top of the other pieces overlapping about 1/8 inch.

Sew together using a 1/2 inch seam, trim edges with pinking shears.


Turn right side out and you are done.

I am personalizing some for the family by adding a strip of Aida cloth with their name on it to one of the folded pieces before assembling (glue it down with fabric glue).