Here is a great way to finish the edges of your fleece blanket project – Without having to sew!
You start out by cutting the fleece just like if you were going to tie the fringe. Next fold the fringe up and make a very small clip in the center of both pieces vertically, aligned with the fringe cut:
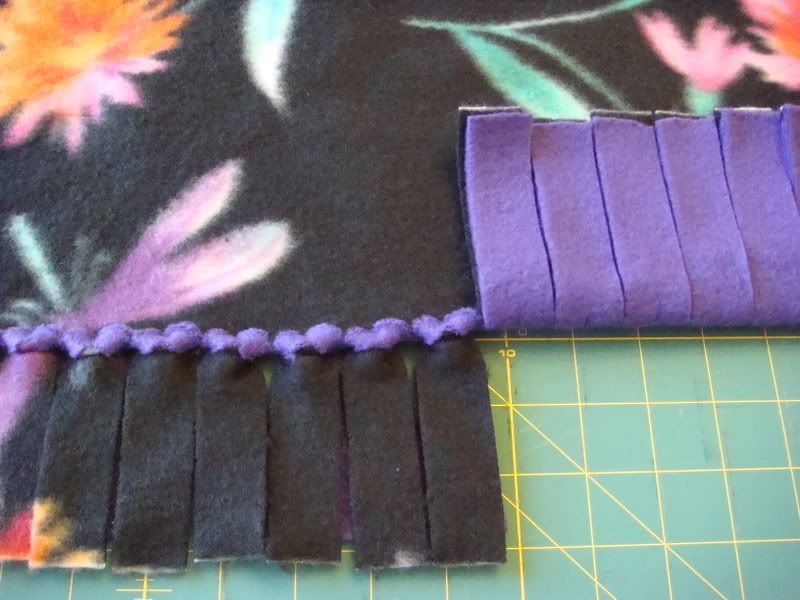
Then push both pieces through the little clip from the top of the blanket through to the back, pull all the way through but not too tight:

It takes longer than if you were to tie them but I like it better because the edges are smooth.
You can see my No-Sew, No Tie Fleece Blanket YouTube Video here, and Here.
Let me know how you like it.
Would this work with cotton as well? And how does it wash? And I would also like to see the video or more pictures please. Thank you.
I love how it looks. Please supple more details for the rest of us. Thanks, Jo
Would love a tutorialon the blanket, need more info or pix on slit size and direction. Thank you!
I’m guessing the slit is made in the middle of the two peices then you take the bottom and push it over and into the small slit….easy….
Would you please send me the tutorial???
I used this method today, and I must sayI love it! Very easy once I got into a rhythm, and very nice finished product. Didn’t seem to take much longer to do than tying knots, either. Thanks for sharing this method.
Nice idea.
A friend used hot glue, at the seams inside (wrong side of fabric). Pros: It has held together very well. Cons: Stiff seams (hardly noticeable), bit more expensive as you need hot glue tools, & a chance of burning yourself and/or the fabric.
Thks for sharing.
I have to say you are much nicer then I am, I can’t believe that many people can’t figure out for themselves how to cut that slit and pull the fabric though, they should not even be holding scissors if that’s the case…lol!!!!
Do u cut the corners out like with the tie blankets??
How secure is the fringe? I don’t want it to come apart in the wash.
As soon as I seen this knot I knew this was what IF wanted to do for my blanket. I did not watch your video just followed instructions here. So I have a couple of tips or at least one. Because the whole is so small to pull the pieces threw I used the blunt end of a wooden chopstick to push a corner through and then pulled the restt through. Hope this helps. My blanket looks awesome. Thank you for the share.
I really like the look of this!
Please send be info. On video
I am curious how the slip through technique holds up over time? Does it last well with use or even during laundering? Thanks, Sherii
I made a video and a few pictures about this if anybody wants to check it out!
http://www.tumblr.com/blog/keznim3
seriously, it’s a VERTICAL SLIT people. How confusing is that? not at all.
Pingback: Creating… a Pleather Pet Bed « Creating… Miranda
I made a blanket the other day. One side black the other black and white checks. we go to Daytona 500 and I thought it would be a cute blanket to take to races. It turned out great and was not hard. Made slits about 1/4 to 3/8″ long and the fleece pulled through much easier with a small chop stick like stick. Took about an hour and a half. My fabric was only about a yard and half (from the remnant bin) Thanks for the pic’s they helped.
The instructions CLEARLY say to clip (cut) the slit VERTICALLY aligned with the fringe cut, which means IN THE SAME DIRECTION. Then push BOTH pieces of the fringe (top and bottom layers) through the slit, not pulling too tight. Bazinga; done!
Awesome idea! One question- is there a problem with them coming undone at all?
I agree with Julie. It looks easy enough for me, and the instructions are complete.
http://acraftycook.blogspot.com/2012/10/no-sew-no-knot-fringe-fleece-blanket.html
Another tutorial for this style blanket
Im most sure that the slit is vertical! Going to be pretty hard to cut on horizontaly! Also if you look close enough you can see them. Just take your pieces the way she did and pull it through! Easy peasy!
to my comment above! Read the instructions!!!
Pingback: An Udate for the New-Sew Fleece Techniques | SandiCrafts